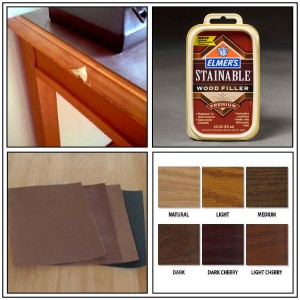
Tired of looking at the dented, scratched and gashed furniture in your home? Or maybe you have some old, slightly banged-up furniture with some potential for greatness in the attic or the garage.
So naturally, you’ve been contemplating whether or not to get rid of the damaged furniture.
Well, maybe you’d be more inclined to keep it if you realized how easy and inexpensive it can be to repair it. Most of the dings can be fixed with a few simple materials, a little bit of time and even less elbow grease.

Here’s what you’ll need:
– Drop cloth
– (2) Towels
– Sandpaper (varying grades)
– Stainable wood stain (matching, of course)
– Piece of unbleached muslin, or similar cloth
Step 1
Place the furniture that you’re going to be working on in a well-ventilated area that won’t be in in the way for another day or so.
Step 2
With a wet cloth, clean the area around the damaged areas you’re going to be working on of any dust, dirt and other impediments. Let it dry completely.
Step 3
Using a putty spreader, apply the wood filler into the crack, indention, etc. Don’t apply too liberally though because you don’t want to make too much work for yourself when the filler dries. Let the filler dry completely.
Step 4
Using the coarse grade of sandpaper, sand the dried wood filler down until it is level with the surface of the furniture itself. Then using a fine grade of sandpaper, smooth the surface of the wood filler as much as possible in order for the wood stain to be successfully applied.
Step 5
Thoroughly mix the container of wood stain. Gather the piece of muslin into a loose ball and dip into the container. Working in a circular motion, evenly apply the stain to the area. Then use a dry area of the cloth to remove any puddling that may occur. Allow to dry. Repeat until the stain matches seamlessly.
Step 6
Enjoy your revived furniture!
